How to download all photos in bulk: a practical guide
SnapPix TeamPublished 11 Aug 202633 min read

The fastest reliable method depends entirely on where your photos live. For personal libraries, use the platform’s own export flow. For public webpages, use a web extractor or browser extension.
Here is the quickest route for each common scenario:
Pro Tip: Always use official exports for private libraries. They preserve embedded metadata and original timestamps in a way that third-party tools cannot replicate.
The most reliable way to download all photos from a personal library is always the platform’s own export tool, whether that is Google Takeout, iCloud’s Photos app, or a cloud drive’s desktop sync client.
| Point | Details |
|---|---|
| Google Photos: use Takeout | Request a Takeout archive on a desktop; keep JSON sidecar files to preserve metadata. |
| iCloud: batch in 1,000s | iCloud.com limits selections to 1,000 items; work oldest-to-newest to avoid gaps. |
| Public webpages: use Extract.pics | Paste the URL, run Deep Extract for paginated galleries, download as a single ZIP. |
| Verify after every export | Compare file counts against platform totals and check EXIF dates, not filesystem dates. |
| SnapPix for event collection | Guests upload full-resolution photos via QR code; you download everything from one gallery. |
For a complete library, Google Takeout is the right tool. The Google Photos web UI at photos.google.com works well for downloading individual items or small selections, but it is not practical for thousands of files.
Using Google Takeout step by step:
Those JSON files matter. Google Photos exports platform-specific metadata such as comments and geo-tags into secondary JSON files rather than embedding everything in the image. Keep them alongside your photos.
One thing that catches people out: when you download a file, your operating system often assigns it a new “modified” timestamp. The original capture date is preserved inside the file’s embedded EXIF metadata, not in the filesystem date. Sort by EXIF date in a photo manager rather than by folder date to keep your chronology accurate.
Pro Tip: After extracting all archives, count the total files and compare against your Google Photos library count. A mismatch usually means one archive part failed to download completely.
The safest route for a full-resolution library export depends on your device. On a Mac, the Photos app gives you the cleanest result. On Windows or via a browser, iCloud.com works but requires batching.
Open the Photos app, go to Photos > Settings > iCloud, and select “Download Originals to this Mac”. Once syncing completes, your full-resolution originals sit in ~/Pictures/Photos Library.photoslibrary. Right-click the library file and choose “Show Package Contents” to access the Masters folder with the raw files.
Install iCloud for Windows, enable iCloud Photos, and set it to download originals. Files appear in your iCloud Photos folder in File Explorer.
Go to icloud.com/photos, select photos, and click the download icon. Apple’s support page confirms you can select up to 1,000 items per batch for web downloads. For a library of 5,000 photos, that means at least five separate download sessions.
A practical batching strategy: sort your library oldest to newest, then work through in fixed blocks of 1,000. This deterministic order makes it straightforward to track where you left off and avoids accidental gaps or duplicates across sessions.
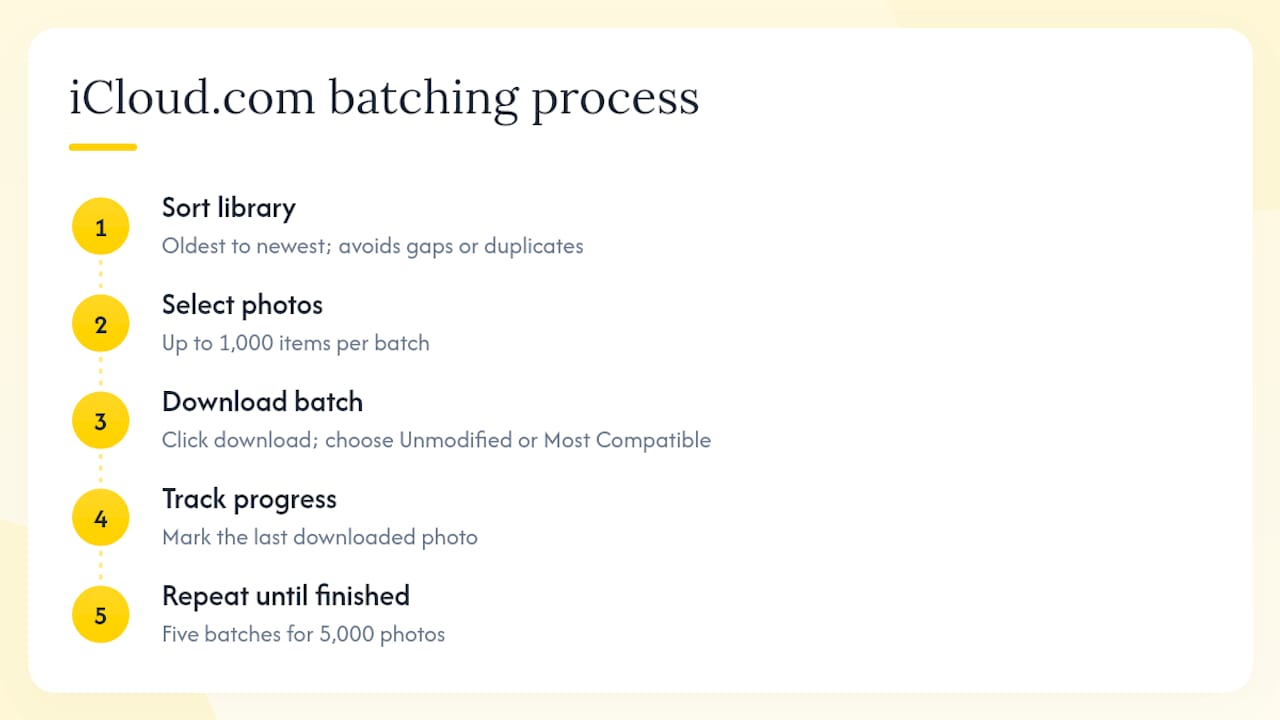
Format note: iCloud.com offers two download options. “Unmodified Originals” gives you HEIC and HEVC files exactly as captured. “Most Compatible” converts them to JPEG and MP4. Choose “Most Compatible” if you need the files to open on Windows or Android devices without extra software.
Pro Tip: On iOS, go to Settings > Photos and set “Download and Keep Originals” before doing any bulk export. This prevents the device from sending compressed versions instead of full-resolution files.
Two types of tools cover this: web-based extractors and browser extensions. Each suits a different situation.
Extract.pics runs entirely in your browser with no software to install. It loads the target page in a real browser session, scrolls to capture lazy-loaded and CSS background images, and can follow pagination through its Deep Extract feature. The result is a single ZIP of all discovered images.
Steps:
Because Extract.pics renders the page as a real browser would, it captures dynamic content that simple HTML scrapers miss entirely. This makes it the better choice for image-heavy galleries with infinite scroll or lazy loading.
The Download All Images Chrome extension detects images loaded on the current page, including those inside nested iframes and blob images. You can filter by minimum dimensions, file type, or URL pattern before downloading, which helps you skip icons and thumbnails. Selections download as a ZIP.
Image Downloader and Imageye work similarly and are worth trying if Download All Images does not detect everything on a particular site.
For sites where extensions keep returning thumbnails instead of originals, Image Max URL (Firefox) uses site-specific rules and query parameters to reconstruct the original-resolution URL from a thumbnail link.
Numbered checklist before running any tool:
Pro Tip: If a CAPTCHA blocks extraction, switch to the official export route if one exists, or slow down your requests significantly. Repeated scraping that violates a site’s terms is not just technically blocked — it can also be a legal issue.
Plan your storage and transfer method before you start. A Google Photos library of 50,000 photos can easily run to 150 GB or more, and downloading that over Wi-Fi on a laptop with limited disk space is a reliable way to end up with a failed or incomplete export.
Practical checklist:
Storage tip: An external SSD is faster and more reliable than a spinning hard drive for large transfers. For long-term preservation, keep two copies on separate physical media or one local copy and one cloud backup.
Official exports may split into multiple numbered archives (e.g., takeout-001.zip, takeout-002.zip). Download every part before extracting. Missing a single part means missing all the files it contained.
Pro Tip: Use a checksum tool (such as MD5 or SHA-256) to verify each archive after download if your export is critical. A corrupted ZIP will fail silently on extraction otherwise.
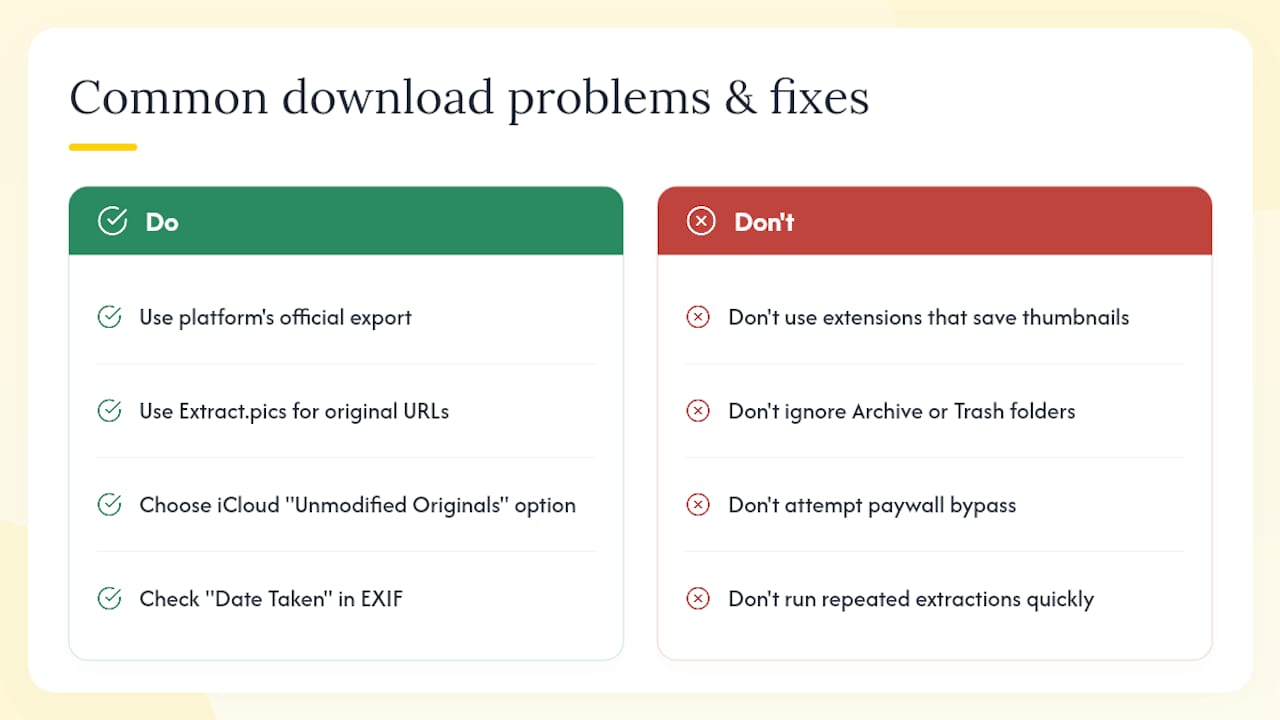
Thumbnails saved instead of originals This happens with browser extensions that grab whatever image URL is visible in the page source. Switch to Extract.pics, which follows original URLs, or use Google Takeout and iCloud’s “Unmodified Originals” option for guaranteed full resolution photo downloads.
Missing images after export Check whether the platform has a separate “Archive” or “Trash” section. Google Photos archived items are included in Takeout by default, but deleted items are not. Also verify that all Takeout archive parts downloaded successfully before extracting.
Images behind a login or paywall Extractors only reach publicly accessible content. For your own private albums, use the platform’s official export. There is no legitimate workaround for content behind a paywall you do not have access to.
Anti-bot blocks and CAPTCHAs These appear when a site detects automated or rapid requests. Use the official export where available. For public sites, slow down your requests and avoid running the same extraction repeatedly in a short window.
Timestamps look wrong after download Your operating system assigns a new “modified” date when a file is saved. The original capture date lives in the EXIF metadata. Open any photo in a metadata viewer (such as ExifTool or your OS’s file info panel) and check the “Date Taken” field rather than the file’s modified date.
Permissions errors on shared albums You can only download photos you own or have been explicitly granted download access to. If a shared album shows photos but the download button is greyed out, the album owner has restricted downloads.
Asking guests to send photos after an event is one of the most reliably frustrating experiences in photo collection. You end up chasing people via WhatsApp, receiving compressed images from social media, and manually downloading from five different sources. Scraping a hashtag or a shared album has the same problem: you get whatever resolution the platform decided to serve, not the original file.
SnapPix solves this at the source. Guests scan a QR code on your event signage and upload directly from their camera roll, no app required. Every upload is full resolution. The gallery stays open for three months post-event, so late uploaders do not miss the window.
The AI smart albums feature automatically groups photos by moment or subject, so you are not sorting through thousands of unorganised files after the fact. When you are ready, you download everything in high resolution from one place.
Pro Tip: Place the SnapPix QR code on your table centrepieces and welcome sign, not just the entrance. Guests who arrive mid-event will still see it, and the photo challenges feature gives them a prompt to start uploading straight away.
The OneDrive desktop app (available for Windows and macOS) is a more reliable route for large libraries. Once synced, your photos are local files and you can copy them directly without any ZIP packaging.
For large Dropbox libraries, the desktop app is again the better option. Install it, let it sync fully, then copy the local Dropbox folder to your destination drive. This avoids the ZIP size limits and gives you the original filenames and folder structure intact.
Your device shapes which options are actually available to you.
Windows gives you the most flexibility. Google Takeout and iCloud.com both work in any browser. The iCloud for Windows app handles full-library sync with originals. OneDrive and Dropbox desktop apps are native to Windows. Chrome extensions including Download All Images install without restriction.
macOS is the smoothest platform for iCloud Photos. The Photos app’s “Download Originals to this Mac” setting is the most reliable way to get a complete, full-resolution local copy. Google Takeout works identically to Windows. Safari does not support Chrome extensions, so use Chrome or Firefox for Download All Images or Image Max URL.
Mobile (iOS and Android) is the most limited option for bulk exports. Google Photos on iOS lets you select multiple items and save them to your camera roll, but doing this for thousands of photos is impractical. For iCloud on iOS, go to Settings > Photos > “Download and Keep Originals” to ensure the device holds full-resolution files, then back up via a cable to a computer. For webpage extraction, Extract.pics works in a mobile browser since it requires no installation, making it the only practical web-extraction option on a phone.
For large libraries on any platform, a desktop computer with a wired connection is the right tool. Mobile is fine for small batches.
Getting the files onto your drive is only half the job. Without a clear structure, a folder of 10,000 unnamed files becomes unusable quickly.
Folder structure: Create a top-level folder by year, then subfolders by month or event. A consistent naming convention such as YYYY-MM-DD_EventName makes chronological sorting automatic in any file browser.
Deduplication: Bulk exports often include duplicates, especially if you exported from multiple sources. Tools such as dupeGuru (free, cross-platform) compare files by content rather than filename, which catches renamed duplicates.
Metadata preservation: Keep the JSON sidecar files from Google Takeout alongside their corresponding images. If you later import into another photo manager, tools like ExifTool can write the JSON metadata back into the image EXIF fields so the original dates and locations travel with the file.
Backup rule: Follow the 3-2-1 principle: three copies of your data, on two different types of storage, with one copy off-site (or in cloud storage). For professional-quality event photos, this level of care is standard practice.
Avoid re-importing duplicates: Before importing into a new photo library (Apple Photos, Google Photos, or similar), run a deduplication check. Most photo managers will create duplicates if you import the same file twice, and cleaning them up later is time-consuming.
The single most useful rule of thumb: if the photos are yours and they live on a platform you control, use that platform’s official export. Google Takeout and iCloud’s native download flows preserve metadata, give you originals, and are the only routes that reliably handle tens of thousands of files without gaps.
Web extractors and browser extensions are genuinely useful, but only for public content. Extract.pics handles lazy-loaded galleries well; Download All Images is the right choice when you need in-browser filtering across many pages. Neither tool is appropriate for private content, and neither guarantees original resolution unless the page itself serves original URLs.
For live event photo collection, the bulk-download problem disappears entirely when you use a purpose-built platform. Asking guests to upload via QR code means you receive full-resolution originals in one organised gallery rather than chasing compressed files across multiple platforms after the fact.
A simple rule: private library → official export; public gallery → extractor or extension; live event collection → SnapPix.
Bulk-downloading photos from guests after an event is one of the most time-consuming parts of memory preservation. You get compressed WhatsApp images, social media crops, and files scattered across email threads. SnapPix removes that entirely.
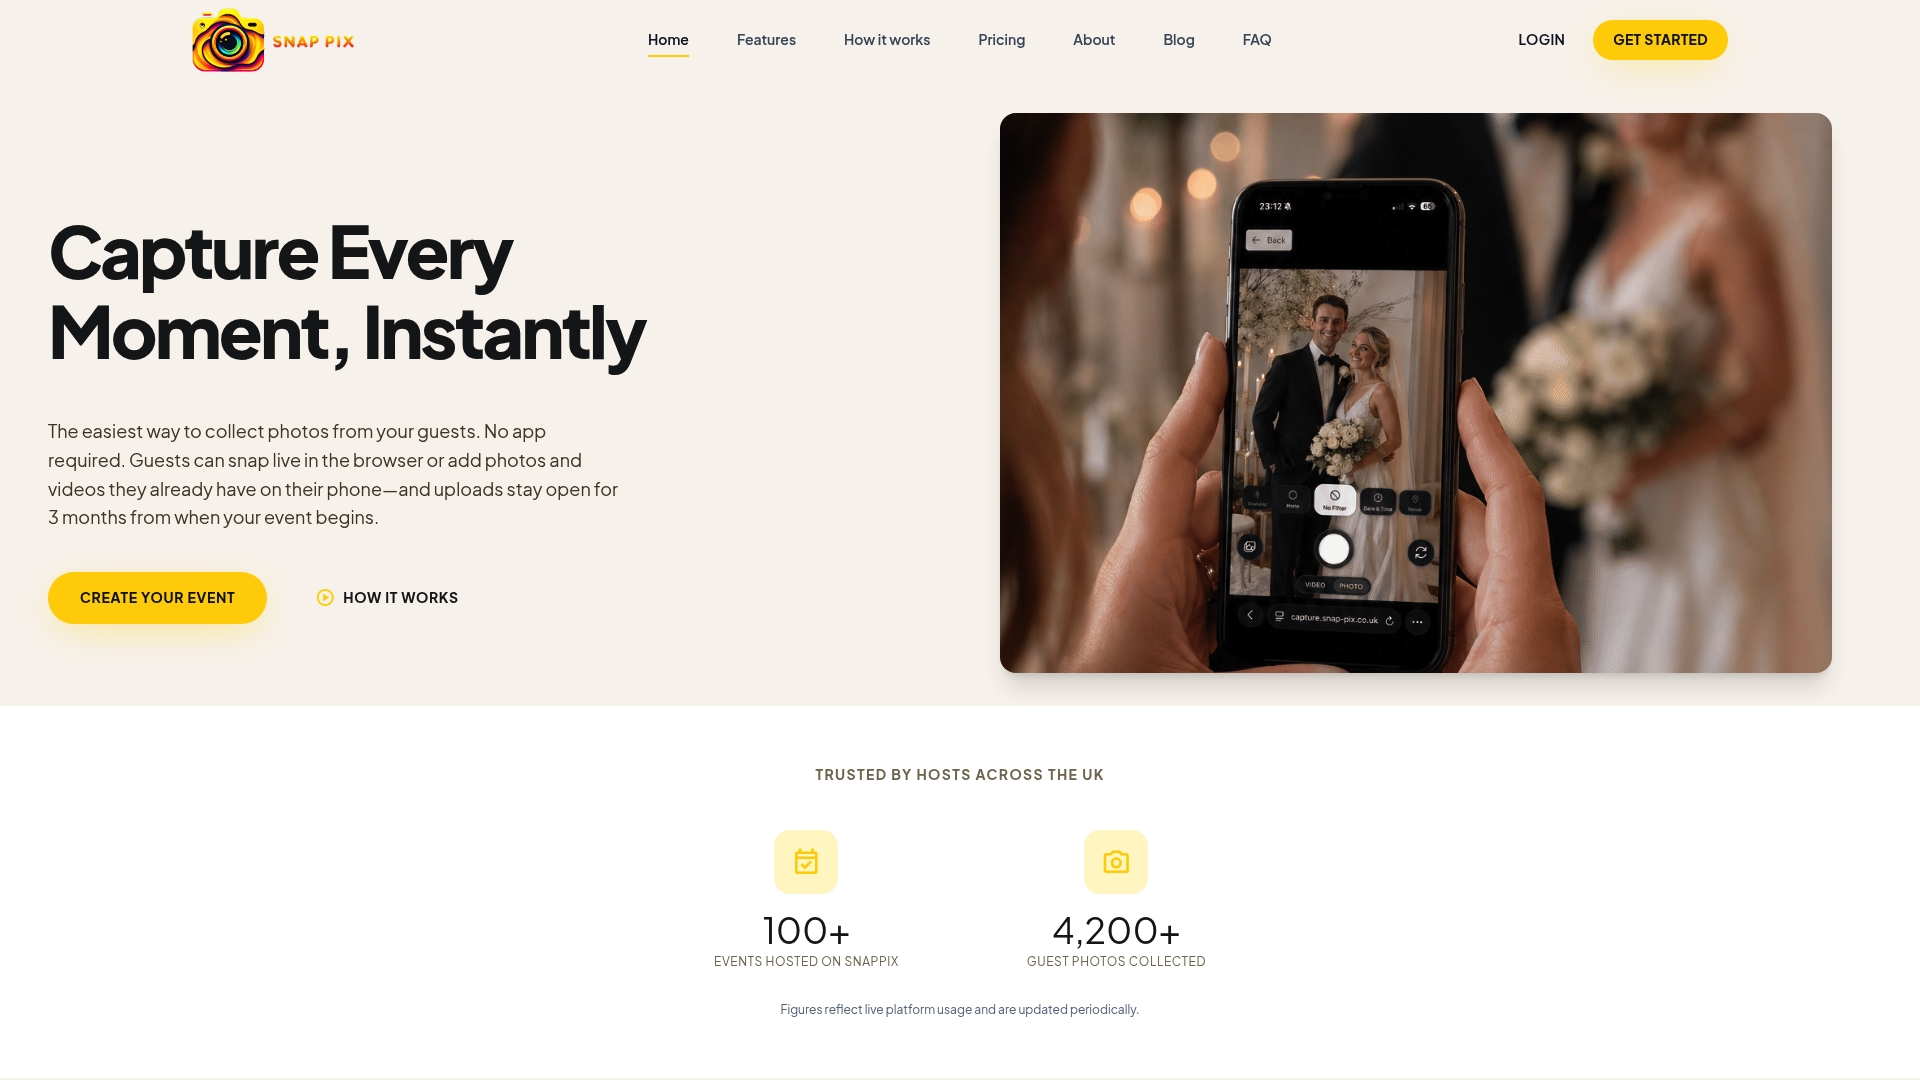
With SnapPix, guests scan a single QR code and upload directly from their camera roll at full resolution, no app needed. The gallery stays open for three months, AI smart albums organise everything automatically, and you download the complete collection in high resolution whenever you are ready. Over 4,200 guest photos have already been collected through the platform. See everything it offers on the SnapPix features page, or go straight to the SnapPix homepage to set up your event gallery today.
The links below are the most authoritative starting points for each platform or tool.
Google Photos help: The Google Photos download guide explains how to save individual items and clarifies the filesystem timestamp behaviour. For whole-library exports, the Google Takeout guide covers product selection, archive splitting, and the recommendation to download on a desktop.
Apple iCloud: The Apple Support iCloud download page details the Photos app workflows for Mac and iOS, the iCloud.com 1,000-item batch limit, and the “Unmodified Originals” vs “Most Compatible” format options.
Extract.pics: The Extract.pics tool page is the starting point for no-install public-page extraction, including the Deep Extract pagination feature.
Download All Images extension: The Chrome Web Store listing covers the extension’s filtering options, iframe detection, and ZIP download functionality.

Event hosts' practical guide to posed and candid photos: perception research, hands on shooting tips, and no app guest uploads to boost candid coverage.

Which event technologies are production ready for 2026 and how to adopt them with clear consent, governance, and a no app QR photo pilot.

Which routes keep EXIF or strip GPS? Quick checks to view or remove metadata, plus a three month workflow to collect guest photos.